Chapter 3 Getting set up
Learning goals
By the end of this chapter you should be able to:
- Install R and RStudio on your own computer.
- Explain the difference between R and RStudio.
- Recognise the main parts of the RStudio window.
- Download the course data and put it where R can find it.
Prerequisites
- A laptop or desktop computer with an internet connection. That is all — this is the very first step.
A tiny motivating example
By the end of this short chapter you will be able to open RStudio, type a line like this into the console, press Enter, and see an answer:
## [1] 2If you can do that and import one of the course data files, you are ready to start.
3.1 R and RStudio are two different things
It is worth being clear about this from the start, because it confuses almost everyone at first:
- R is the programming language and the engine that does the actual computing. On its own it is not much to look at.
- RStudio is a separate, much friendlier program — an “integrated development environment” (IDE) — that sits on top of R and makes it pleasant to use: somewhere to write scripts, run code, and see your results and plots side by side.
You install both, but for this course you will normally open RStudio — it starts R for you behind the scenes.
Takeaway: Install R and RStudio; work in RStudio.
3.2 Installing R and RStudio
What we’re about to do: Get both programs onto your computer. There are two separate downloads from two different websites.
Step 1 — Install R (from CRAN). Go to the official R website, CRAN, at https://cran.r-project.org. In the “Download and Install R” box at the top, choose the download for your operating system — Download R for Windows or Download R for macOS — then run the installer and accept the default options.
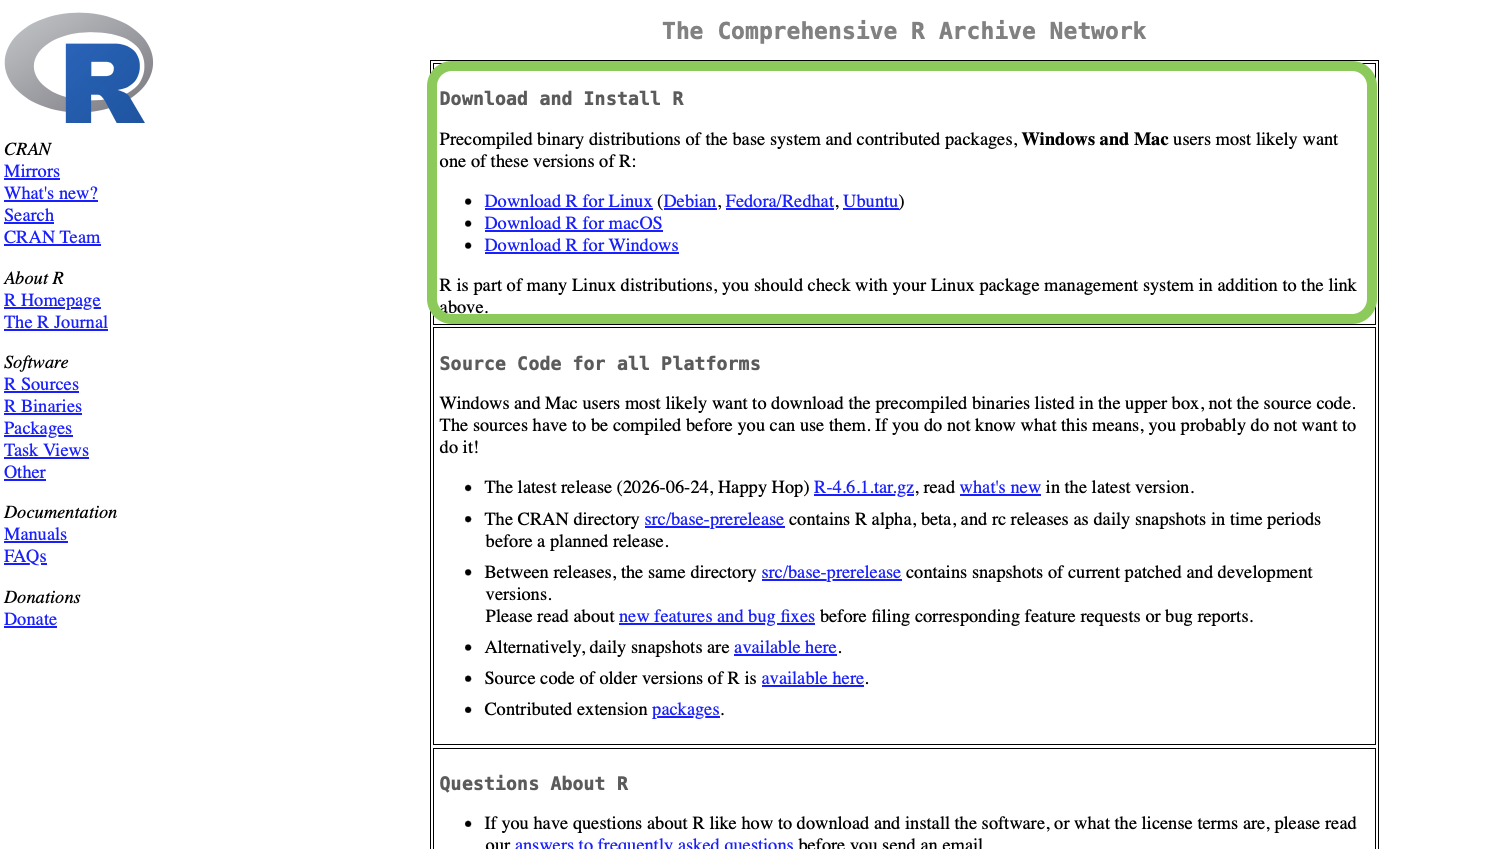
Figure 3.1: Downloading R from CRAN: use the “Download and Install R” box at the top of the page.
Step 2 — Install RStudio Desktop (from Posit). Go to https://posit.co/download/rstudio-desktop/ and download the RStudio Desktop installer — the free, open-source version — for your operating system. Run it and again accept the defaults.
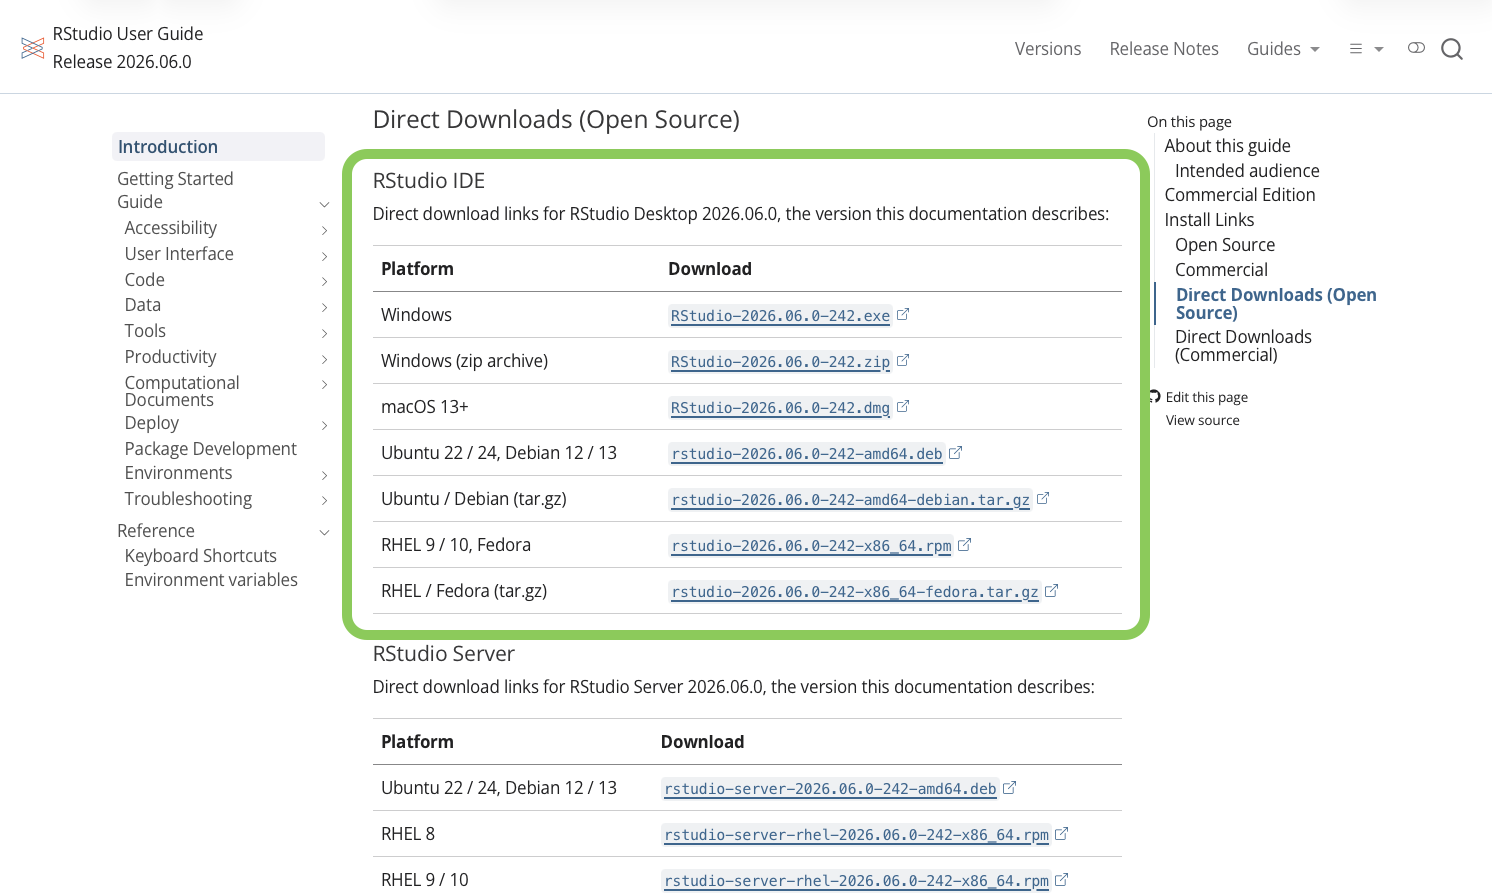
Figure 3.2: Downloading RStudio Desktop from Posit: choose the installer for your operating system.
Install R before opening RStudio for the first time, so that RStudio can find it.
Do this now: Install R (from CRAN), then RStudio (from Posit), then open RStudio (not R). You should see a window divided into panes, described next.
Common mistake: Opening “R” (a very plain window) instead of “RStudio”. If the program you opened looks bare and old-fashioned, close it and open RStudio instead.
Takeaway: R comes from CRAN and RStudio comes from Posit. For this course, you will normally work in RStudio.
3.3 A quick tour of RStudio
What we’re about to do: Get oriented so the window is not intimidating.
When you open RStudio you will see four main panes. (You may see only three at first — the top-left one appears as soon as you open or create a script.)
- Source / editor (top-left): where you write and save your scripts. This is where most of your work happens.
- Console (bottom-left): where code actually runs and results appear. You can also type here directly for quick, throwaway commands.
- Environment / History (top-right): lists the objects (data sets, variables) currently loaded in R’s memory.
- Files / Plots / Packages / Help (bottom-right): browse files on your computer, view plots, manage installed packages, and read help pages.
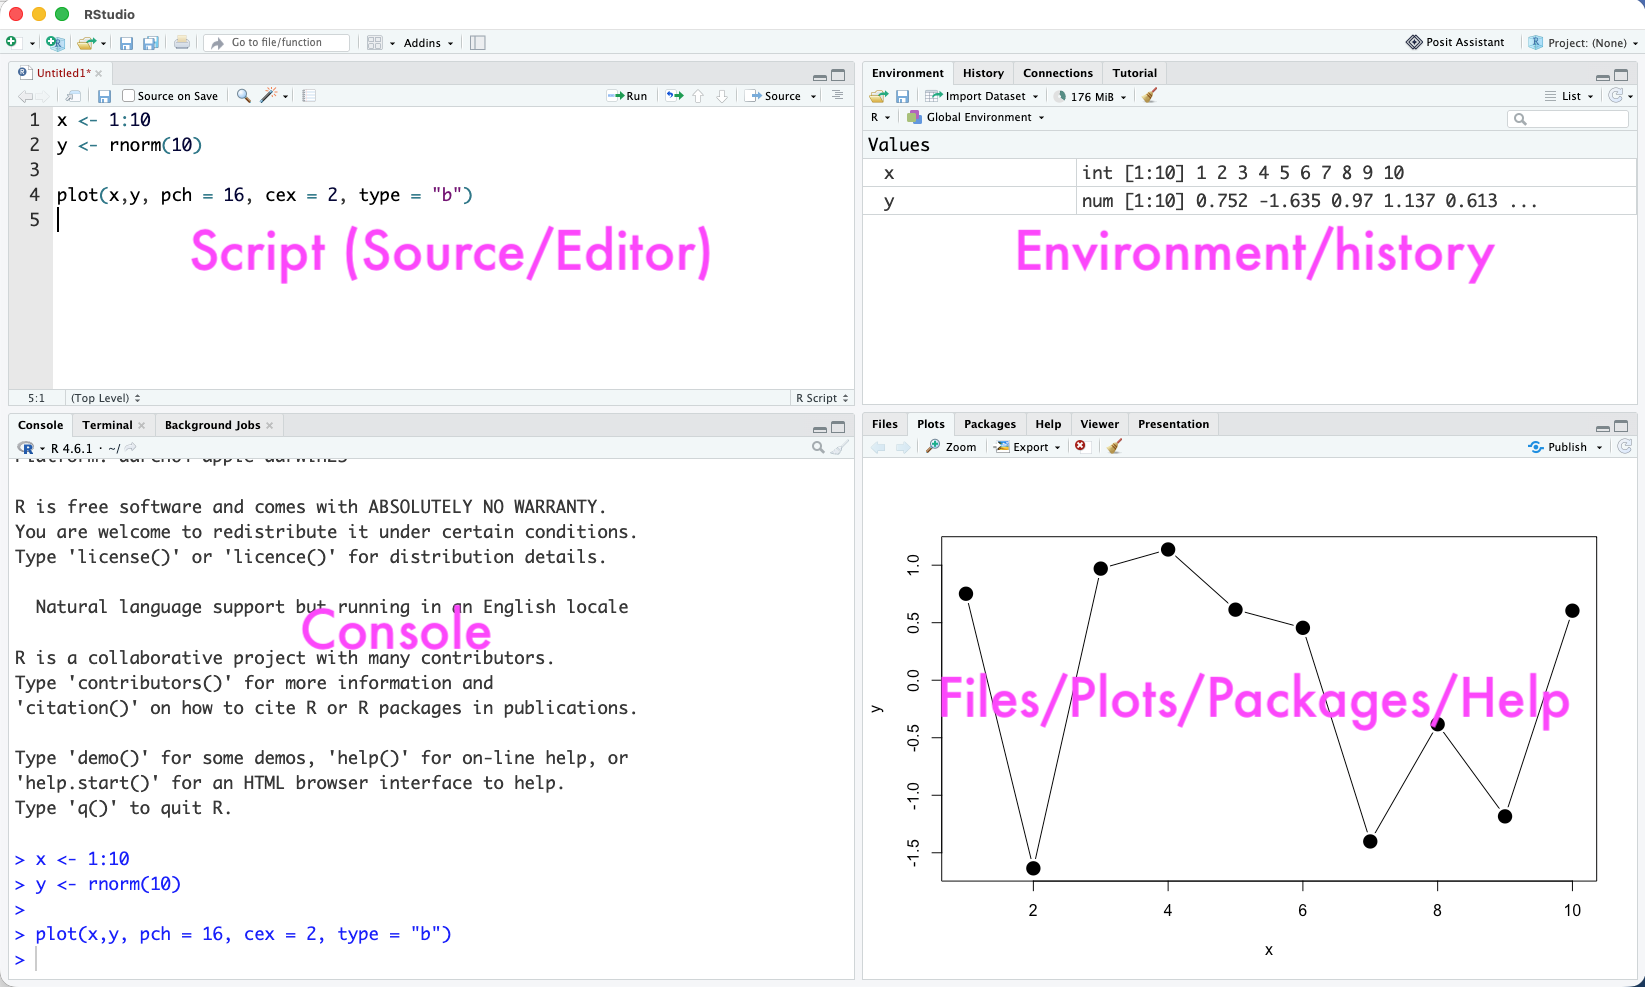
Figure 3.3: The four panes of the RStudio window.
Try this: Click in the Console,
type 1 + 1, and press Enter. You should see the answer
appear. Congratulations — R is working.
Takeaway: Four panes — editor, console, environment, and files/plots/help. You will use all of them.
3.4 Get the course data
What we’re about to do: Download the data used throughout the book and put it somewhere R can find it.
Almost every example in this book reads a data file from a folder called CourseData. Here is how to set that up:
- Download the data from the course Dropbox folder:
https://www.dropbox.com/scl/fo/5tdl9dtflv79lkvq86vuj/h?rlkey=spw81m08re1ufef5uvxcopgla&dl=0. Dropbox lets you download the whole folder as a single
.zipfile. - Unzip it. This gives you a folder called
CourseDatacontaining many.csvfiles. - Create a course folder. Create a folder called
BB852somewhere sensible, such as your Documents folder, and moveCourseDatainto it. In the next chapter, you will turnBB852into an RStudio Project.
After you create the RStudio Project in the next chapter, a command like this will work without a long file path:
Common mistake: an error such as cannot open file 'CourseData/...': No such file or directory. This almost always means the CourseData folder is not inside your project folder, or that you are not working inside your RStudio Project. The Paths and projects chapter explains how to fix this properly.
Takeaway: Keep CourseData inside your project folder and refer to files with short, relative paths.
3.5 Key takeaways
- R is the engine; RStudio is the friendly interface. Install both, open RStudio.
- The RStudio window has four panes: editor, console, environment, and files/plots/help.
- Put the
CourseDatafolder inside your project and refer to files with relative paths.
3.6 Common pitfalls recap
- Opening R instead of RStudio.
- Installing only R or only RStudio, rather than installing both.
- Downloading the data but leaving it in your Downloads folder, so R cannot find it.
3.7 Try this
- Install R and RStudio, and open RStudio.
- In the Console, type
1 + 1and thenR.version.string, pressing Enter after each. - Download and unzip the course data, then put
CourseDatainside a folder calledBB852.
You are now ready to turn the BB852 folder into an RStudio Project in the next chapter.